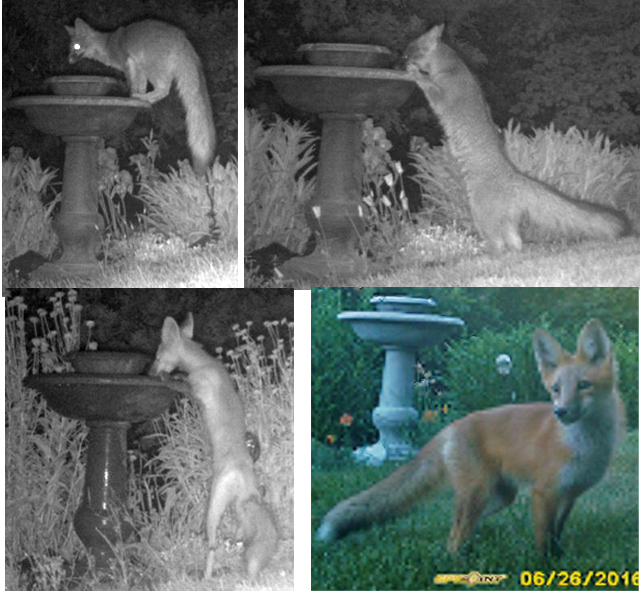
I thought you would enjoy seeing four of the game camera shots that got me excited about a potential painting. I started with a series of thumbnail drawings to decide which photos to use and to try different placements of the foxes for the best design. Knowing a centered composition has definite challenges, I still chose to keep the fountain pretty much centered relying on the balance of triangular shapes to make it work.
Step 2
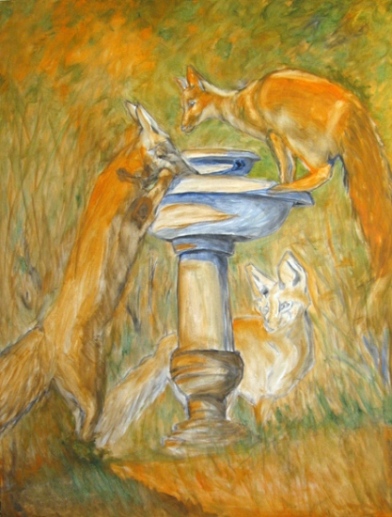
This is the end of the first day of painting. Though I enjoy acrylics, my favorite medium is still oil for larger paintings. I decided on an over-all warm painting. I started my canvas by roughing in the main shapes. The shapes need to be refined. My upper fox is looking more like a kangaroo Hmm. Since two of my fox photos were night-time shots, I see I need to do some research for developing the upper foxes inner body shapes, faces and eyes. I do like the low horizon looking up at the foxes.
Step 3
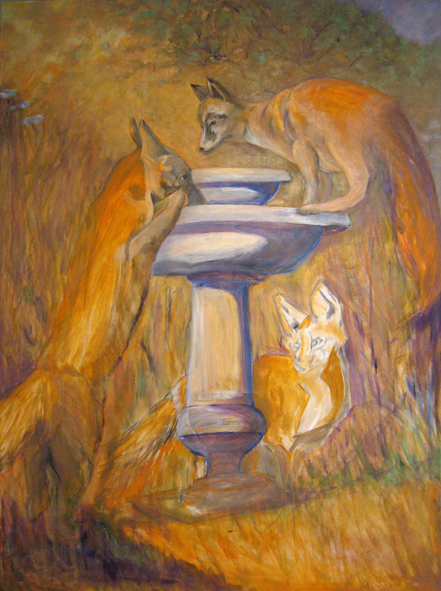
I'm still working on shapes and starting to develop faces and personality. There are actually a multitude of Shasta Daisies in this area and gambrel oak in the background. At this point I am deciding how much to include or exclude. The lighting on the night photos leave me with some interesting decisions for placing the lighting. At this point I'm thinking behind from the upper left.
Step 4
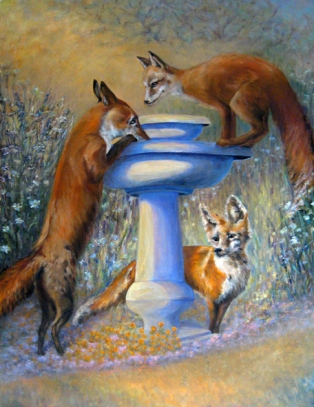
I've jumped to the final painting here. I changed the lighting from behind to the left and slightly from the front. The foxes now each have a personality and I'm finally satisfied with their shapes and proportions. I've picked up more of the blues and purple in the foilage and adjusted the fountain. I added a few more distinct flowers and placed some in front of the upper right foxes tail for depth. I have kept a triangular design whenever possible offseting the roundness of the centered fountain. I definitely love having foxes in my backyard.
"FOX FOUNTAIN" is an oil painting on a 30" x 40" canvas.
The development of "SNOW DEER"
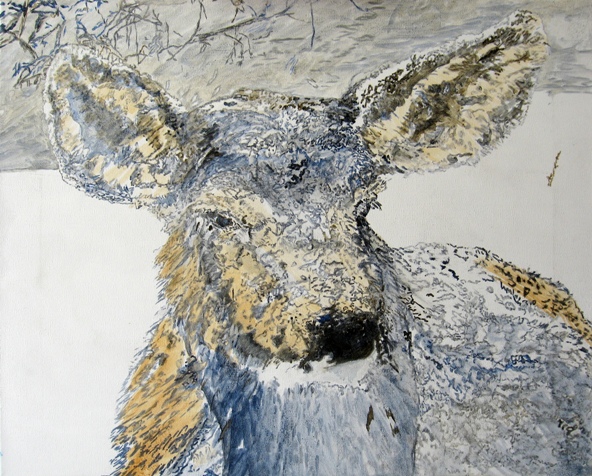
Step 1
This deer was sitting at the edge of my patio, about 12 feet away from me, for at least an hour. With a photograph to capture her original position and time to sketch, I had the best of both worlds to start this on my canvas. I decided to handle this painting as I would a portrait making the detail of the deer dominant. Using graphite to draw, I established the overall form and positioned the features. I took my drawing further than usual on the canvas focusing on getting a feel for the strokes of light and dark fur and snow patterns with my pencil before I started with the paint brush. Then I started with washes of thin paint, both to set the graphite and to start establishing color values. I established the start of a muted background that wont distract from the deer.
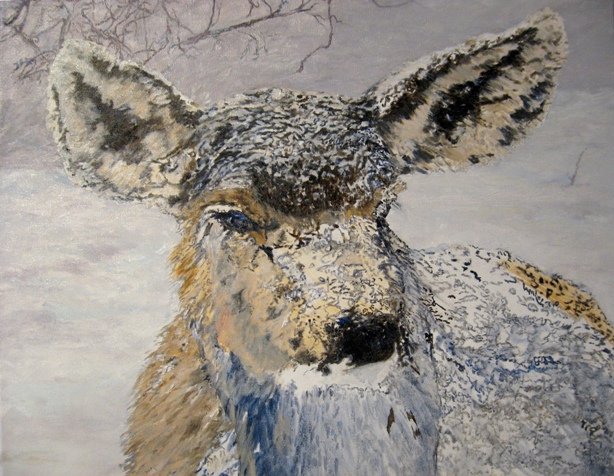
Step 2
I continued working on the background giving it contour and definition within the snow. With the basic background in place I could feather the edges of the ears into the background color. There were such intricate shape changes within the very soft feel for the fur of the ears verses the stiffer feel of the coarse fur and frosty clumps on the deers head. I wanted to paint the eyes and nose next to establish my darkest darks for comparison as I developed the colors for the rest of the head and body of the deer. My choice of brushes varied from the sable for the ears to the stiff brushes for the head, then back to the softer brushes around the eyes. I wanted to capture the amazing detail I could see in the frosty eyelashes and the way the snow stayed on her face in selected areas.
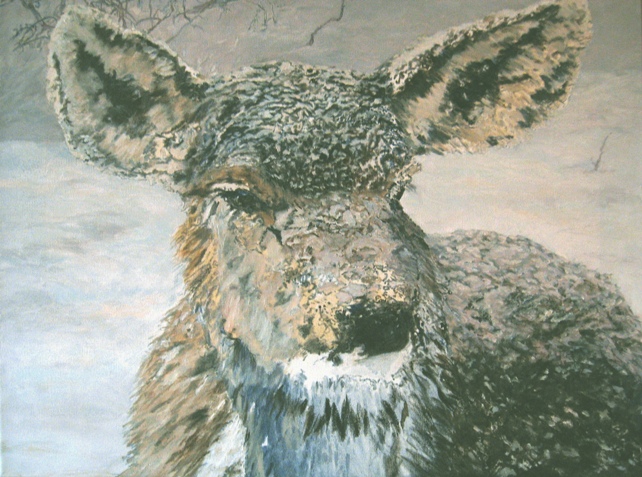
Step 3
For this step I begin working on the Deers back, sides and bib. For the back area; the deer has dark, stiff fur. The snow is accumulating and clumping more on the back than on the sides. This area has some back lighting and indirect light so I am using some of the far background colors on the snow clumps for contrast to the snow around her. I continue to use the stiffer brushes for this type of fur. For the bib area, I begin developing detail and contrast to define the shapes and separation of chin, neck and chest.
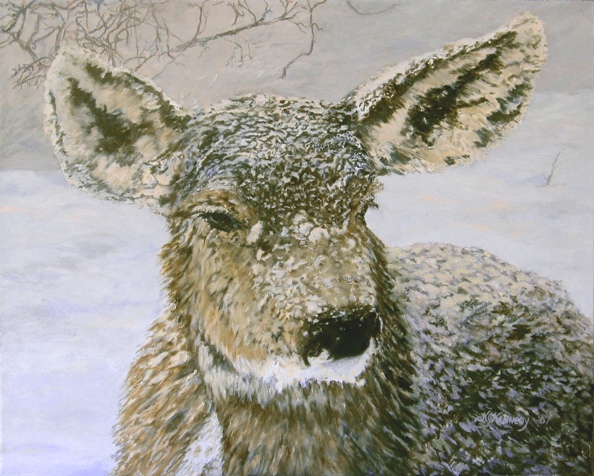
Step 4
As I am completing the snout and bib, I am also reviewing all other areas of the deer to add additional detail as needed. For the snout, I finished the fur layer adding texture and contrast to give it better shape definition. Then I added the pattern of snow clumps. Using the shapes and definition I developed previously in the bib, I completed this area with the fur colors I had established when painting the snout. As a final step, I went over the whole composition adding detail touches such as additional snow clump patterns on the deers sides and highlights to the eyes and nose.
"Snow Deer" is an oil painting on a 16" x 20" canvas.
The development of "A New Beginning"
Step 1
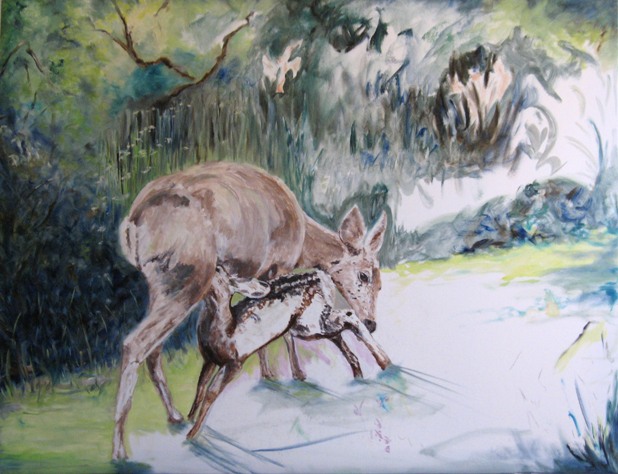
Using a grid on the photo resolved the problem areas I had in drawing the complicated interaction between the doe and her fawn. My step-by-step begins with the first day of painting. The sketch of the deer was transferred to the canvas positioned it so it would feel as close as I actually saw them in my yard. I loosely defined the shapes within the animals to give them a three-dimensional look. I started with the dark areas using Burnt Umber and Ultramarine Blue reducing the blue in the lighter value darks. The lightest areas are painted with white and varying amounts of Raw Sienna. The medium values are a mix of the same colors. I will correct and adjust colors when all the colors on the canvas have been established. The background is started simultaneously showing much of the elevation that is actually in my yard. Im using a triangular dark shape behind the roundness of the deer for contrast in color and shape. The distant tree branches on the left upper area that work into the vertical flow of the daisies behind the does back brings your eye to the deer. The movement on the right side is starting to develop. I have added Cerulean Blue and Thalo Yellow Green plus a tint of cadmium red light to my palette.
Step 2
The foreground is developing shape with a broad triangular spring green color. I am adding shadows and color variations for interest using warmer blues and a tint of cadmium red light and cadmium yellow light. The shadows for the deer are roughed in before I finish the greens near the deer.
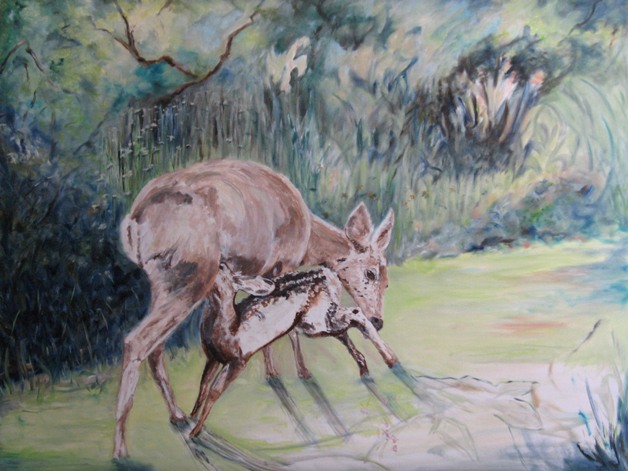
Step 3
I completed the spots on the fawn noting the natural patterns and variations in size and intensity. Now Im working on the finishing details by adjusting colors, edges, and the overall balance. Im bringing in more of the reds in the deer and flowers by using burnt sienna and cadmium red light in various mixes. I will add more detail to the near right side foliage to create a better overall balance.
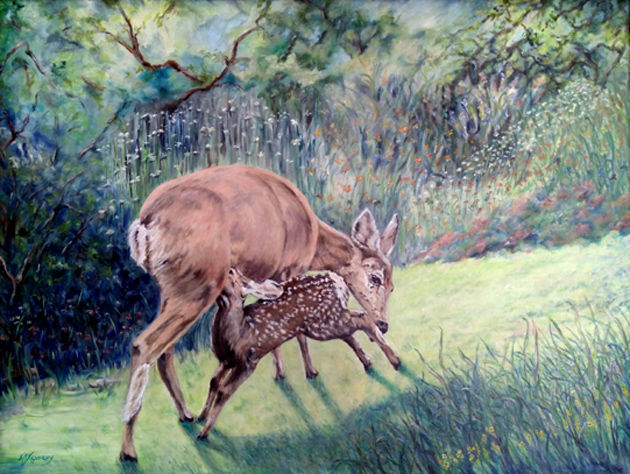
Step 4
I named the final piece A New Beginning. This painting was awarded Best of Show in the 2009 Spring Forward juried show. The jurors comments on this painting were: Good balance and background, Great movement and flow, and Technique sets it apart more than the theme.
"A New Beginning" is an oil painting on a 30" x 40" canvas.
Please contact me with your comments, questions, or to request purchase information at: karen@karenkennedyart.com